Shared hosting is very popular, especially who are looking for budget hosting to host their application. If you are just finished your laravel project in your local environment and intend to deploy your project on shared hosting like cPanel or you already tried to deploy but it's not working as expected then you are in the right place. Here I'll show you complete instructions and step by step process on how to deploy a laravel project on shared hosting.
Because it's shared hosting and maximum shared hosting provider will not provide you ssh access for their security concern. So you can not deploy or run artisan command like php artisan serve as you are habituated. Don't worry, It's very simple I'll show you all the stuff to deploy your laravel project into shared hosting. Let's start.

In shared hosting cPanel, you will not able to run the php artisan serve command, In this situation, you have to remove the public word from the URL in your Laravel project. So that you can easily access your Laravel project without php artisan serve command as like a normal php project. It's simple to do. Let's do that.
index.php, .htaccess files from the project public folder and paste into the project root directory.require __DIR__.'/vendor/autoload.php';$app = require_once __DIR__.'/bootstrap/app.php';
N.B Because we have removed the public word form URL so that we have to write the public word in the asset helper method where we have linked our CSS, JS or image file.
Example asset('css/style.css') will be asset('public/css/style.css')
If your yet not clear then watch this short video for a clear demonstration on how to remove the public from the URL from a Laravel project.
Open your database using phpMyAdmin or any MySQL client that you use. Then export the database and save it into your PC.
Select all project files without the git, node_modules folders if exist in your Laravel project and then ZIP all files and folders.
Log in to your shared hosting cPanel and create a database & user. Now save the database name, user & password into a text file in a safe place.

From shared hosting cPanel, go to the phpMyAdmin option, select the database that you have created earlier for your laravel project and then go to the import tab. Now choose your exported database file and hit the Go button.

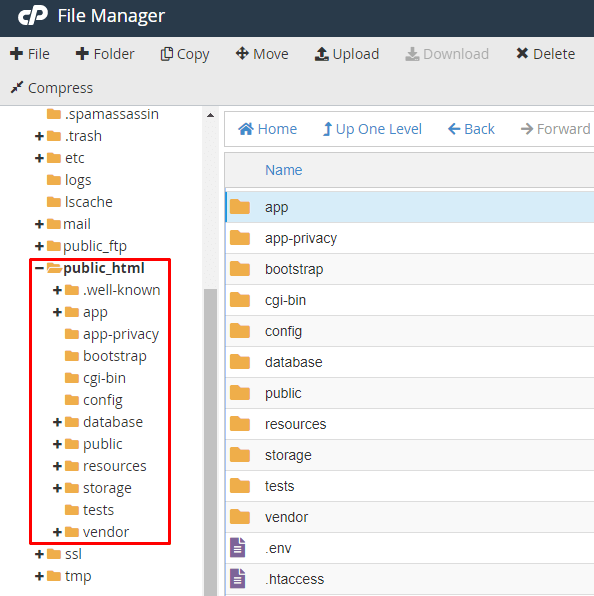
Now upload the entire project ZIP file into public_html in your shared hosting cPanel and extract the folder. Keep in mind everything must be in the public_html folder, not any subfolder into public_html.
Open database.php file from config folder and update your database name, username & password into the database.php file and save. Do not put your database details or any sensitive credentials in the env file for shared hosting.
'mysql' => [
    'driver' => 'mysql',
    'url' => '',
    'host' => '127.0.0.1',
    'port' => '3306',
    'database' => 'mydatabase',
    'username' => 'mydbusername',
    'password' => 'here_password',
    'unix_socket' => '',
    'charset' => 'utf8mb4',
    'collation' => 'utf8mb4_unicode_ci',
    'prefix' => '',
    'prefix_indexes' => true,
    'strict' => true,
    'engine' => null,
    'options' => extension_loaded('pdo_mysql') ? array_filter([
        PDO::MYSQL_ATTR_SSL_CA => env('MYSQL_ATTR_SSL_CA'),
    ]) : [],
],
Ok, our application successfully deployed in shared hosting cPanel. Now we can use our application or website by hitting our domain name. Please follow step no 8 also to configure some security stuff for your Laravel project.
We have to protect our htacces, env files from direct access, and disable directory browsing for our application. For that open the .htaccess file from the public_html folder and write these codes at the end of the file and save.
#disable directory browsing
Options -Indexes

#PROTECT ENV FILE
<Files .env>
order allow,deny
Deny from all
</Files>

#PROTECT ENV FILE
<Files .htaccess>
order allow,deny
Deny from all
</Files>
Hope this post will help you to host your laravel project on shared hosting cPanel. If you find this post helpful then please share this with others.